🎯 Learning Objectives
- Use formative feedback in order to improve development work
- Create a basic application using the Python Editor with micro:bit
- Describe and explain some of the advantages and disadvantages of a code editor in comparison with the Blocks Editor
💬 Key Vocabulary
- annotation
- peer review
- development log
- python
- editor
- code
📝 Starter Activity – How are you doing?
We have now created three programs using the blocks editor and the micro:bit. You should have an idea of whether this kind of programming is an easy or difficult topic for you.
Talk with the person next to you about how you have found this topic so far and where you would rate your skill on a 1 (I know nothing) to 5 (I am a pro) scale.

📝 Level 1 – Self Review
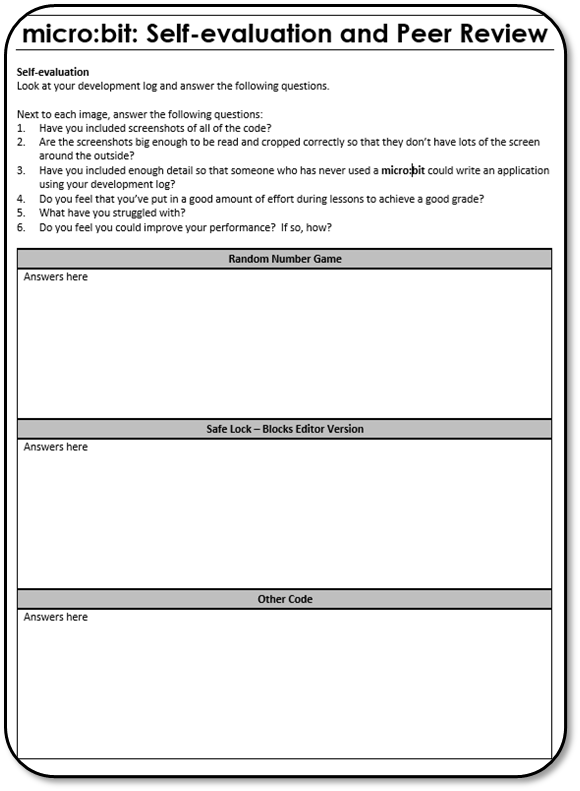
- Complete the Self-evaluation and Peer Review sheet.
- Firstly, review your own performance so far, then ask a friend to review your work.
- Do they feel you are achieving your target effort grade?
- Do they feel you are including enough detail in your level tasks to be a useful tool for revision?
📖 Improving your work
- Remember detail is the key to making your notes useful to revise from.
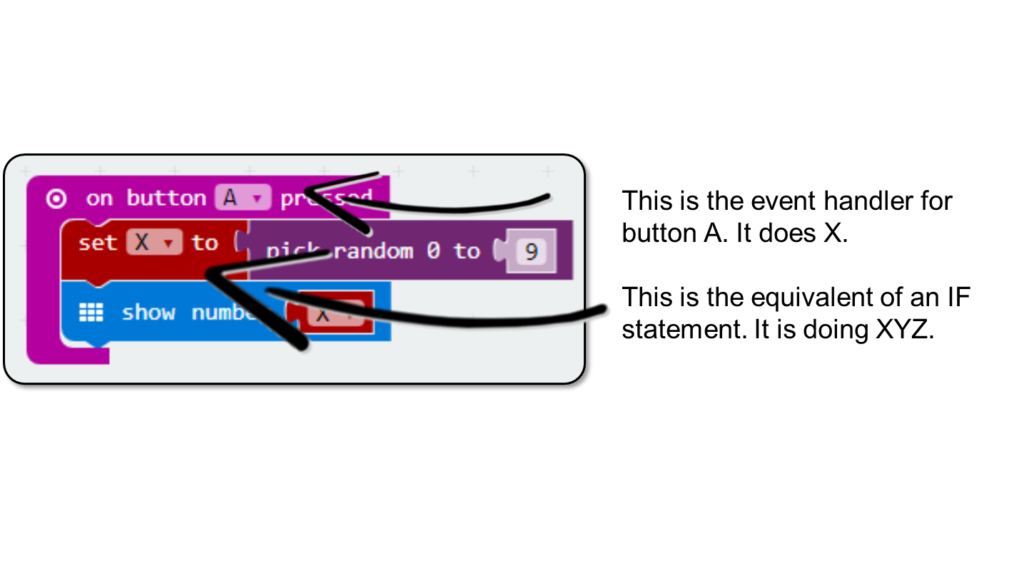
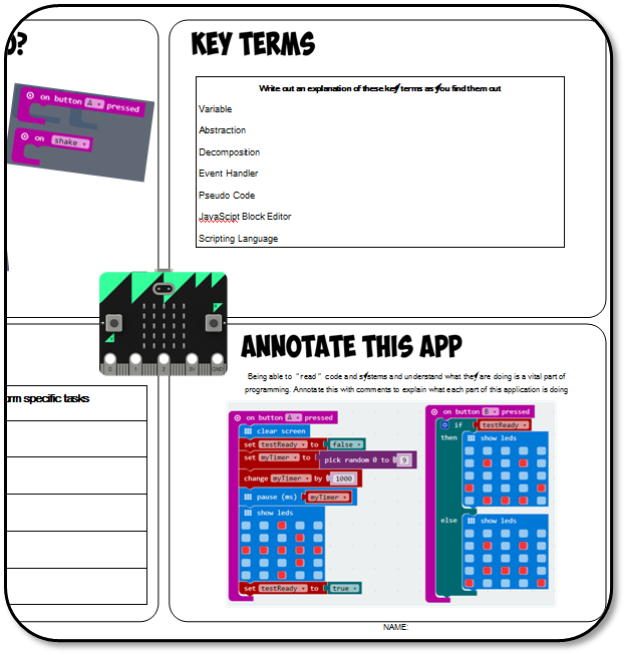
- Use the teacher and peer feedback to improve your level task notes. Include annotation for every block. Look at the example below.
- If possible, try to start putting pseudocode in.
📖 Adding to your notes
- Now is the time to finish the notes PowerPoint file from Lesson 1 – Level 3.
- Add in the remaining sections now.
📝 What’s the problem?
- Identify some of the limiting factors when creating programs using the Blocks Editor.
- What about if we wanted to make a really complex game or safe lock code?
📝 Python Coding
- The micro:bit offers a more advanced programming language called Python.
- Python is a programming language where you need to actually type in code.
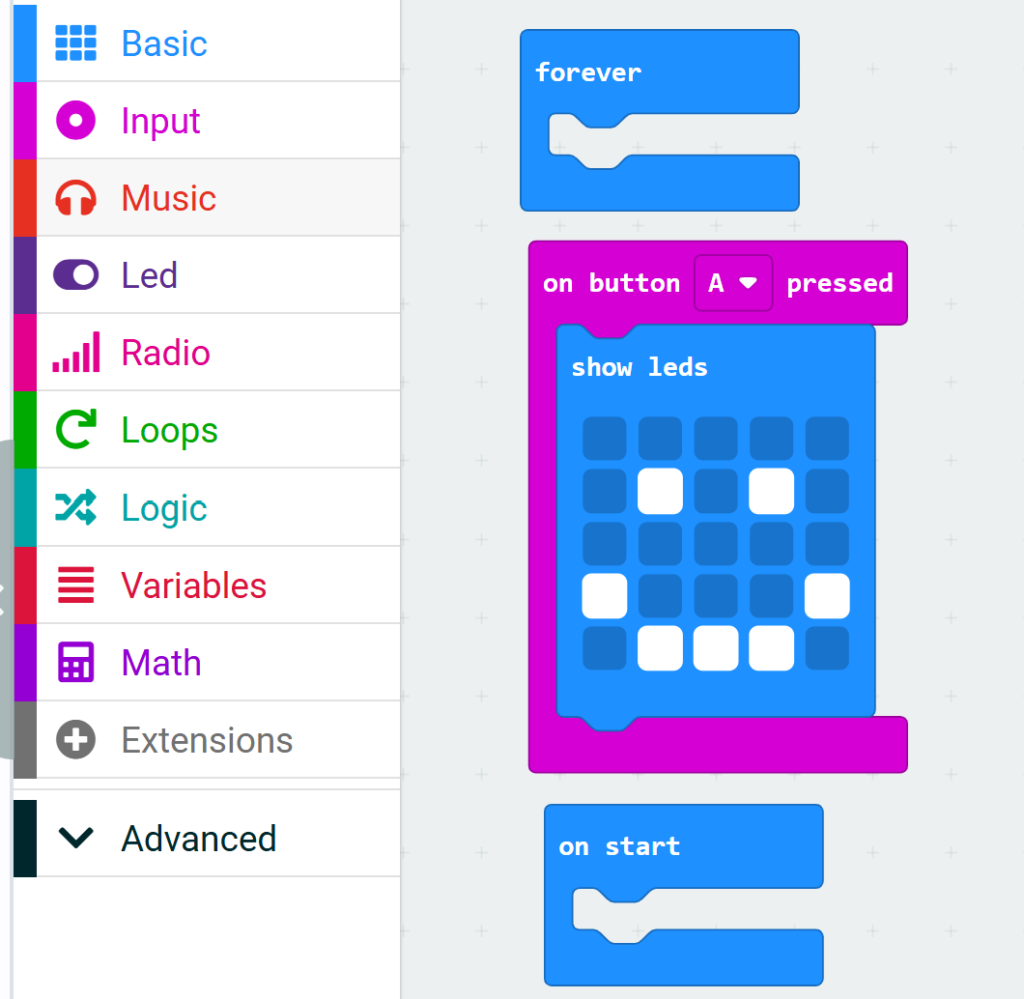
- Go to https://makecode.microbit.org/ and create a new project called “My first python code”
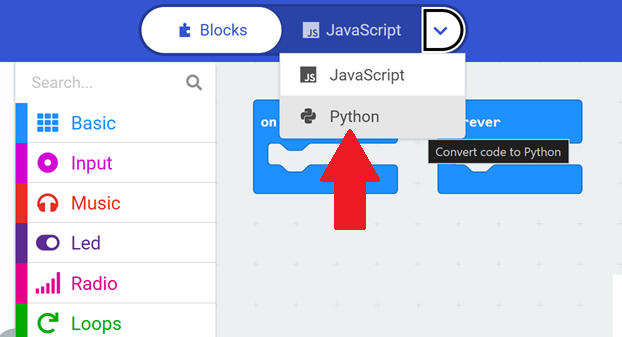
- Then click on the small arrow next to the word “Javascript” at the top of the screen
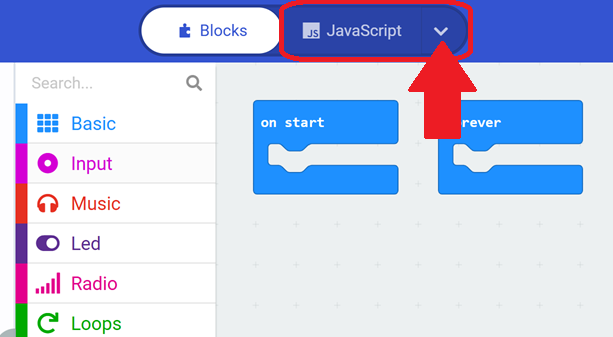
- Then choose Python from the drop down menu.
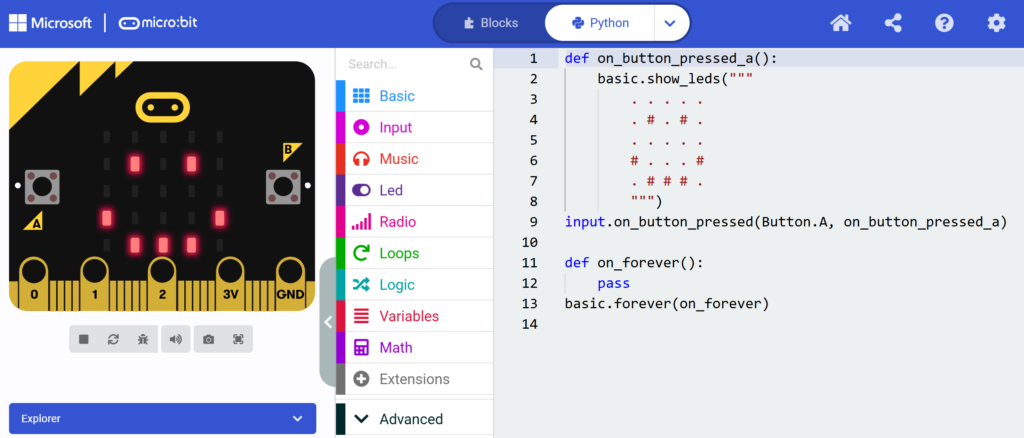
This is what Python code for the micro:bit looks like:
📝 Python Hints & Tips
Big differences between the Blocks Editor and the Python Editor:
- If your code has an error in it (even a simple spelling error) it won’t run on the micro:bit. You WILL make mistakes and this is OK!
- If your code has an error in it, the micro:bit will tell you there was an error and the line number it occurred on. This will help you to look back over your code and correct the mistake.
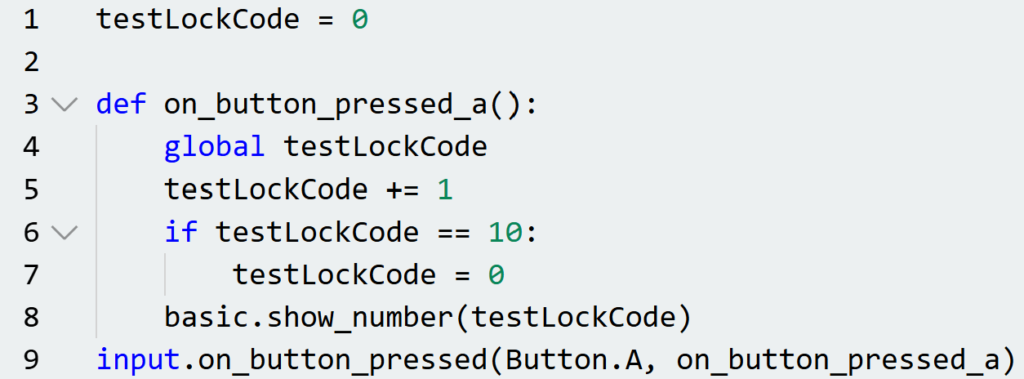
What do you notice about the similarities between pseudocode and Python?
IF button_a isPressed THEN
ADD 1 to testLock
IF testLockCode = 10 THEN
SET testLockCode to 0
DISPLAY testLockCode on screen
📝 Level 2/3 – Safe Lock System in Python
Download the worksheet below to create a more powerful program than the Blocks Editor version that accepts a three-digit code instead of just one.
Once you have completed the code, do the following to test it:
- Press button A repeatedly until the micro:bit displays the number 5.
- Press button B. The micro:bit will display a tick and then go blank.
- Repeat the above steps TWO more times.
- The micro:bit should then display a box, then a smiley face to say that the lock is open.
- If you get the combination wrong, it should display a box, then a sad face.
- To restart the micro:bit, press the reset button on the back.
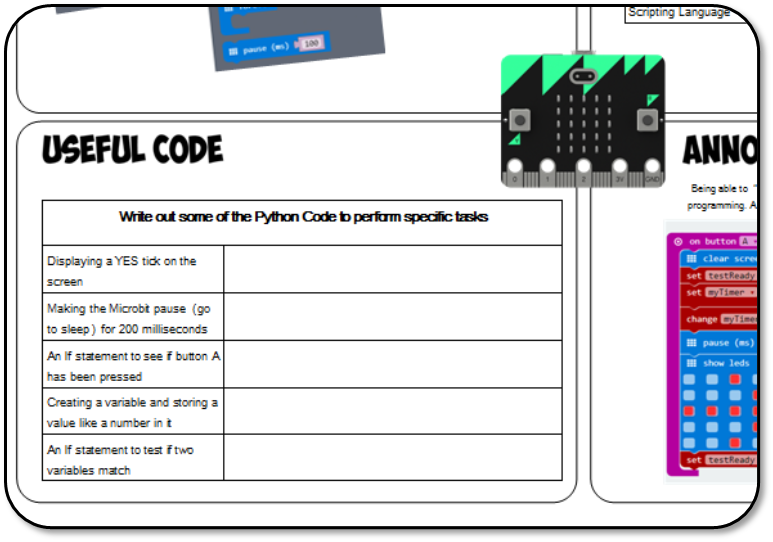
📝 Adding to Your Notes
- Look at the code on your screen. Add notes to the ‘Useful Code’ section of your micro:bit notes sheet from the first lesson.
- (This is going to help you to revise!)
In this lesson, you…
- will have critically reflected on the Python code you made for your BBC micro:bit.
- will have evaluated your code to identify any bugs and ensure it meets the project requirements.
- will have used the self review to help consolidate your understanding of fundamental programming concepts.
Next lesson, you will…
🏅 Level up
🥇 Level 1
- Complete the self review and compare with the person next to you. Upload the completed review to Teams.
🥈 Level 2
- Write down the Python code from the Level 2/3 worksheet into Makecode and make sure it works correctly, upload a screenshot of your code to Teams.
🥉 Level 3
- Complete one of the two extension tasks in the Level 2/3 worksheet and upload a screenshot of your coding showing it to Teams.